
Arcade Machine
(RetroPie)
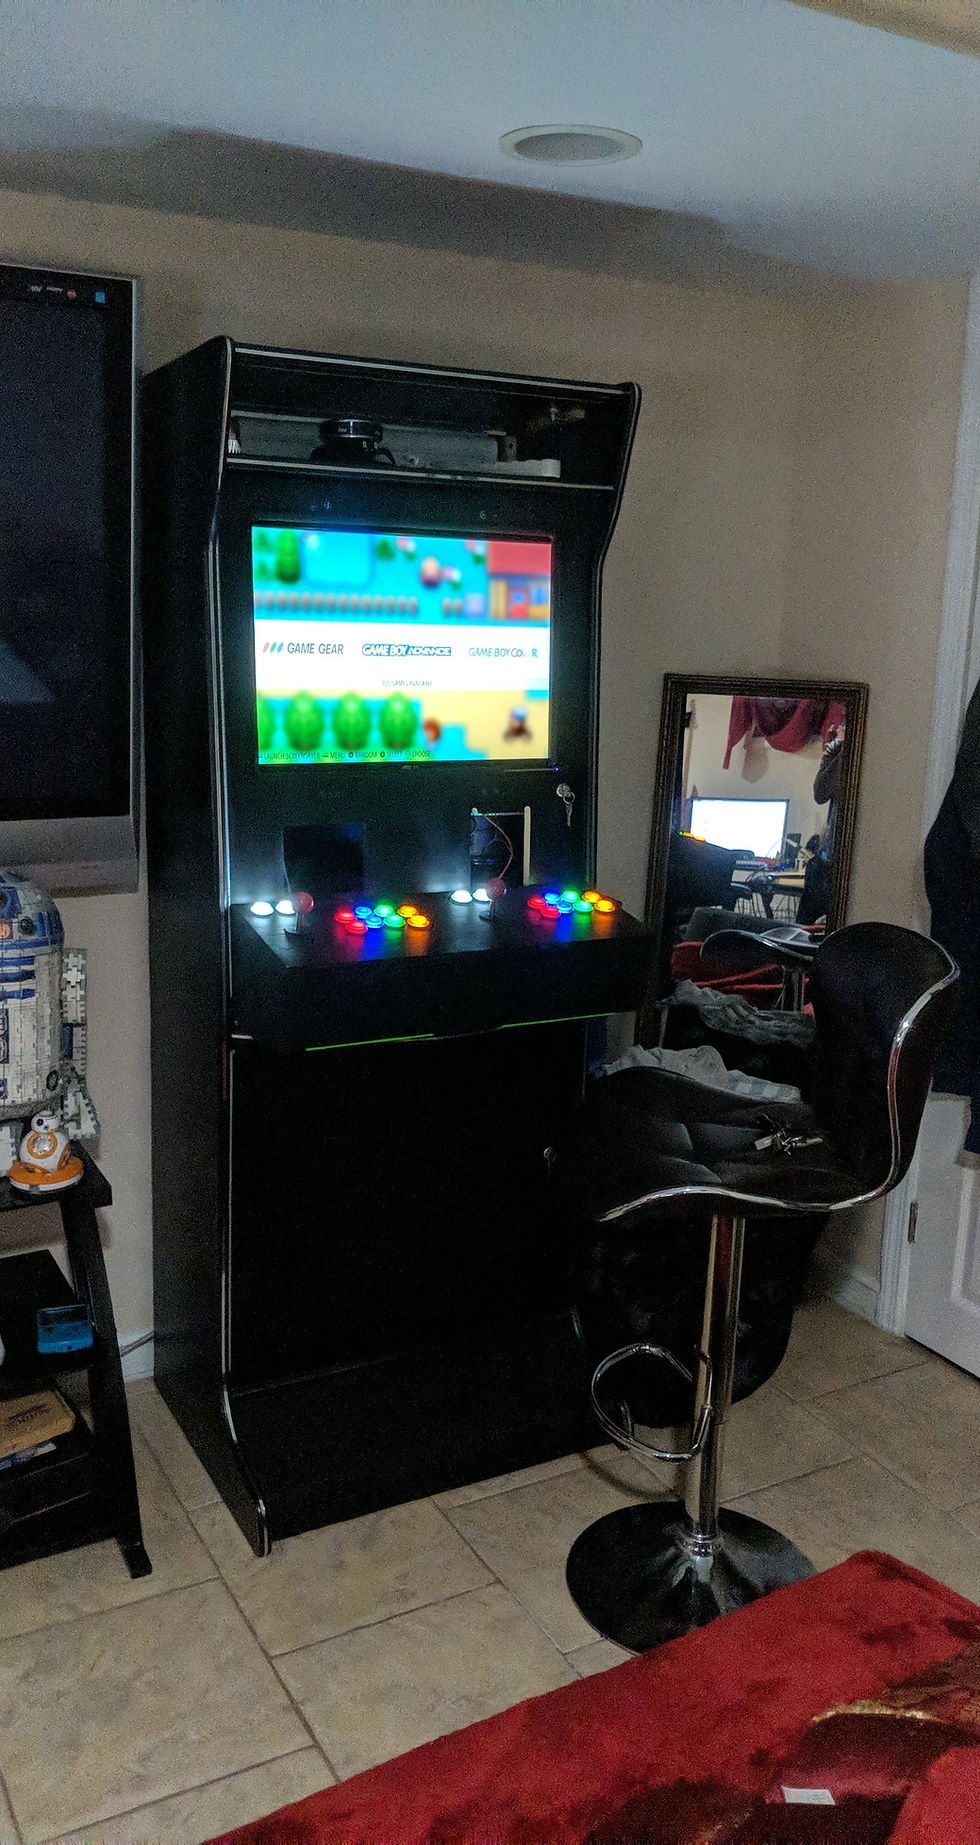
Finished Cabinet (minus the Marquee)

Wood cut with the help of CAD and measured and drawn onto plywood then holes and shapes were cut accordingly

Buttons and Joystick inside before wiring was done
Finished Cabinet (minus the Marquee)
Project Overview
2018
This was more of a "for fun" project done with my Dad because we both really loved playing arcade games together when I was younger. Using a Raspberry Pi 3 running Retropie (and the necessary hardware) We were able to play all of the old games we had on older systems that no longer worked anymore!
Arcade Body:
There are many guides on the internet on how to build one of these so I decided it would be a fun project to work on with my dad who knew much more about woodworking than i did but is also an electrical engineer. We bought an old Casino arcade machine body and built the controller portion separately using CAD to design the shapes we wanted to cut into the wood and printing the scale drawings to stick to the wood and cut.
Electronics:
The electronics for this were not really very difficult because we decided to buy a board that is already configured to be read by the retropie system on the Pi 3.
Parts List:
-
Raspberry Pi 3
-
TV Screen
-
Ipac2 Board
-
20 Buttons
-
2 Joysticks
-
Wood & Woodworking tools